



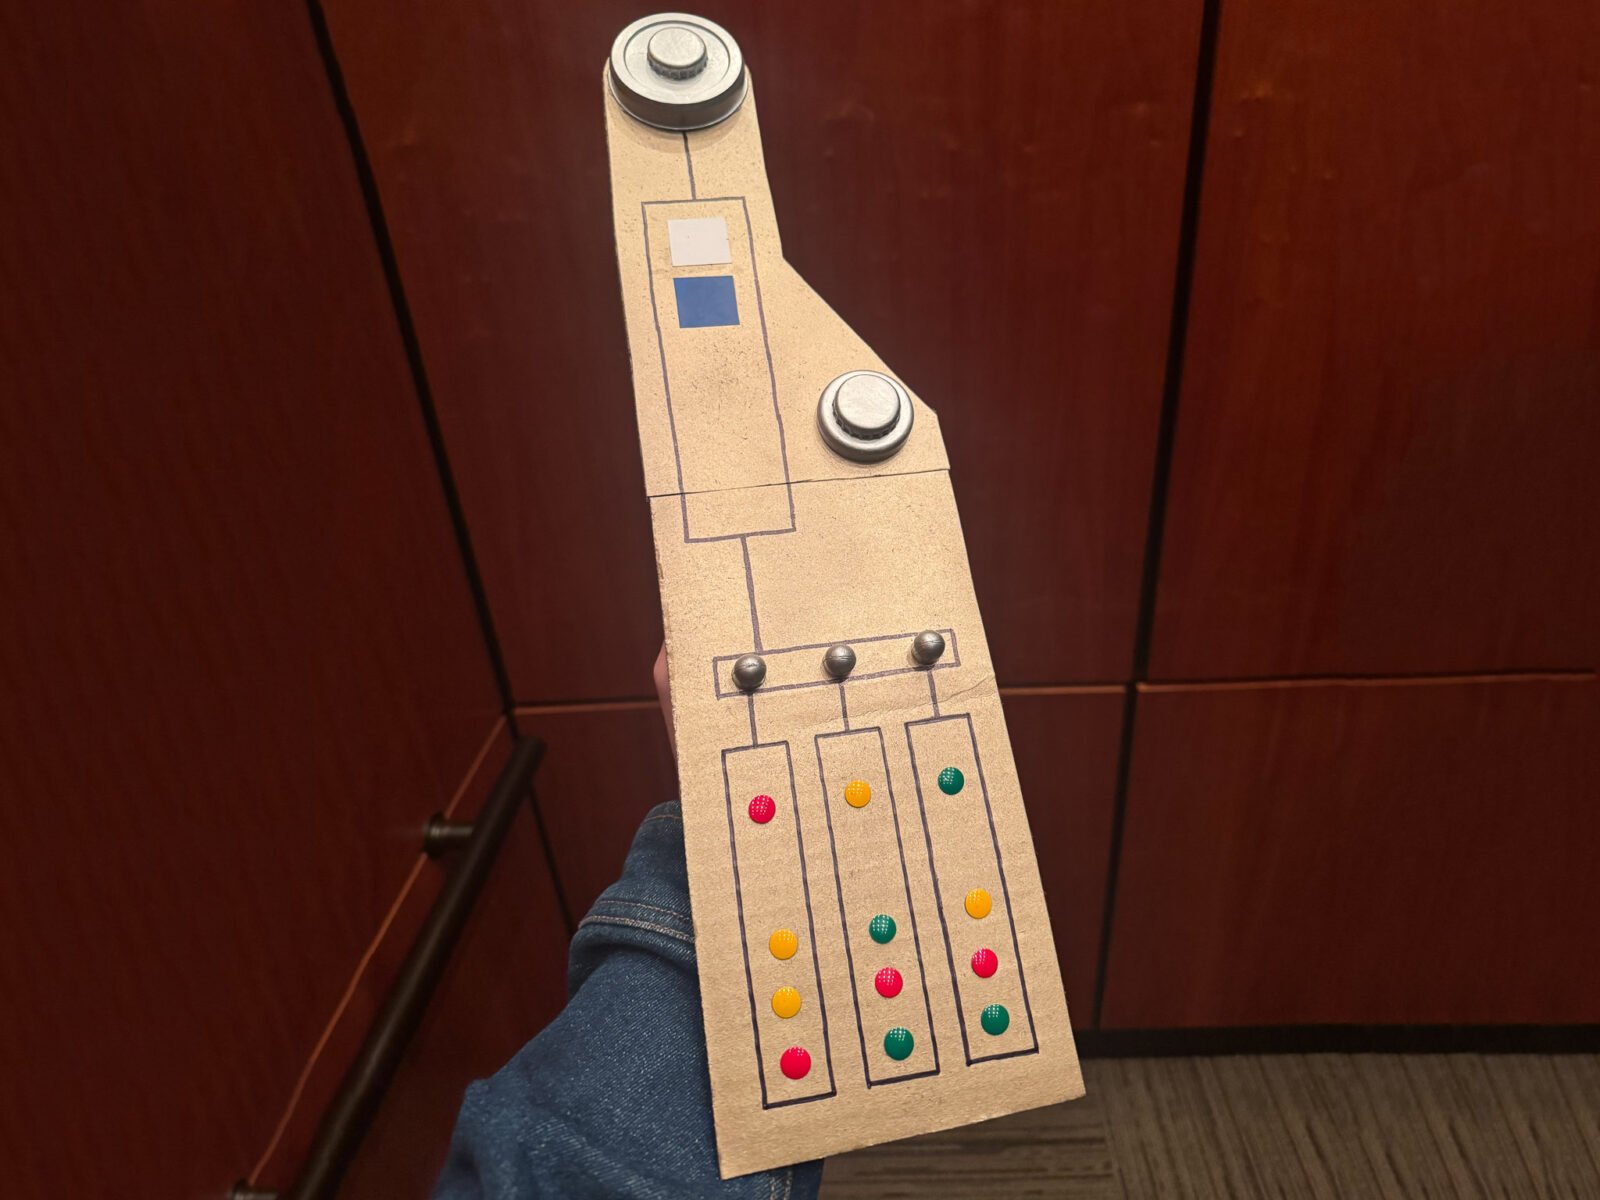

Unleash Your Inner Jedi: Craft a Star Wars Control Panel from Everyday Scraps
Ever dreamt of having a piece of the Star Wars universe right in your home? While 3D printers might seem like the gateway to prop replication, the truth is, you don’t need one to bring a touch of the galaxy far, far away into your living space. Thanks to the ingenuity of “kitbashing,” you can now construct your very own Star Wars control panel, echoing the intricate designs seen in Luthen Rael’s iconic workshop from the hit series Andor, using nothing more than cardboard, caps, and creativity.
The Allure of Luthen Rael’s Galactic Antiquities
Fans of Andor
will instantly recall Luthen Rael’s mesmerizing gallery, “Galactic Antiquities and Objects of Interest,” on Coruscant. This treasure trove was not just a front for Rebel activities but a veritable Easter egg hunt for dedicated Star Wars enthusiasts, brimming with nods to films, TV shows, and video games across the saga. The desire to own a piece of that meticulously crafted world is strong, and while 3D-printed replicas are impressive, they’re not the only path.
Kitbashing: Your Gateway to DIY Star Wars Props
Enter the art of “kitbashing” – the practice of creating something new by combining existing model parts or, in this case, everyday household items. Mechanical engineer Crew Parker, Lucasfilm’s asset coordinator and a true expert in movie props, has brilliantly devised a method to replicate a Star Wars control panel using readily available materials. Forget expensive machinery; all you need are humble supplies like cardboard, paper, hot glue, Elmer’s glue, a Sharpie marker, colorful pushpins, and a collection of bottle caps and lids destined for the recycling bin. A splash of silver and gold paint will add that authentic metallic sheen, and for the truly ambitious, integrating LEDs and real pushbuttons can elevate your creation to a new level of immersion.
Your Mission, Should You Choose to Accept It: The Crafting Steps
This engaging project, originally featured in Make: Volume 99, is designed to be accessible, requiring just 1–3 hours and minimal cost. The journey to your personalized Star Wars prop unfolds through a series of straightforward steps:
- Cut Out the Basic Shape: Lay the foundation for your control panel.
- Assemble the Panel: Bring the cardboard layers together to form the structure.
- Paint the Panel: Apply base colors and metallic accents to give it a weathered, futuristic look.
- Add the Line Details: Use a Sharpie or paint to create the intricate wiring and panel lines.
- Make the Greeblies: Transform bottle caps, lids, and other scraps into the iconic “greeblies” – the small, non-functional details that add realism to sci-fi props.
- Make the Buttons: Craft functional or decorative buttons using pushpins or other small objects.
With Crew Parker’s guidance and your own creative flair, you’ll be well on your way to commanding your own segment of the Rebel fleet, or perhaps just adding a fantastic, unique decoration to your personal hideout. May the Force of creativity be with you!
For more details, visit our website.
Source: Link





Leave a comment